


















Convert images
Convert images shows, for each kind of image, how many images have their copies, and creates the missing ones while you watch. You need it after the installation and after big changes; the rest of the time the automatic conversion does the work (Automatic conversion).
While images wait for a copy, the header of every section has the button Create missing copies, with the number of images waiting; it opens this section. Once nothing waits, the button is gone.
Images of your shop
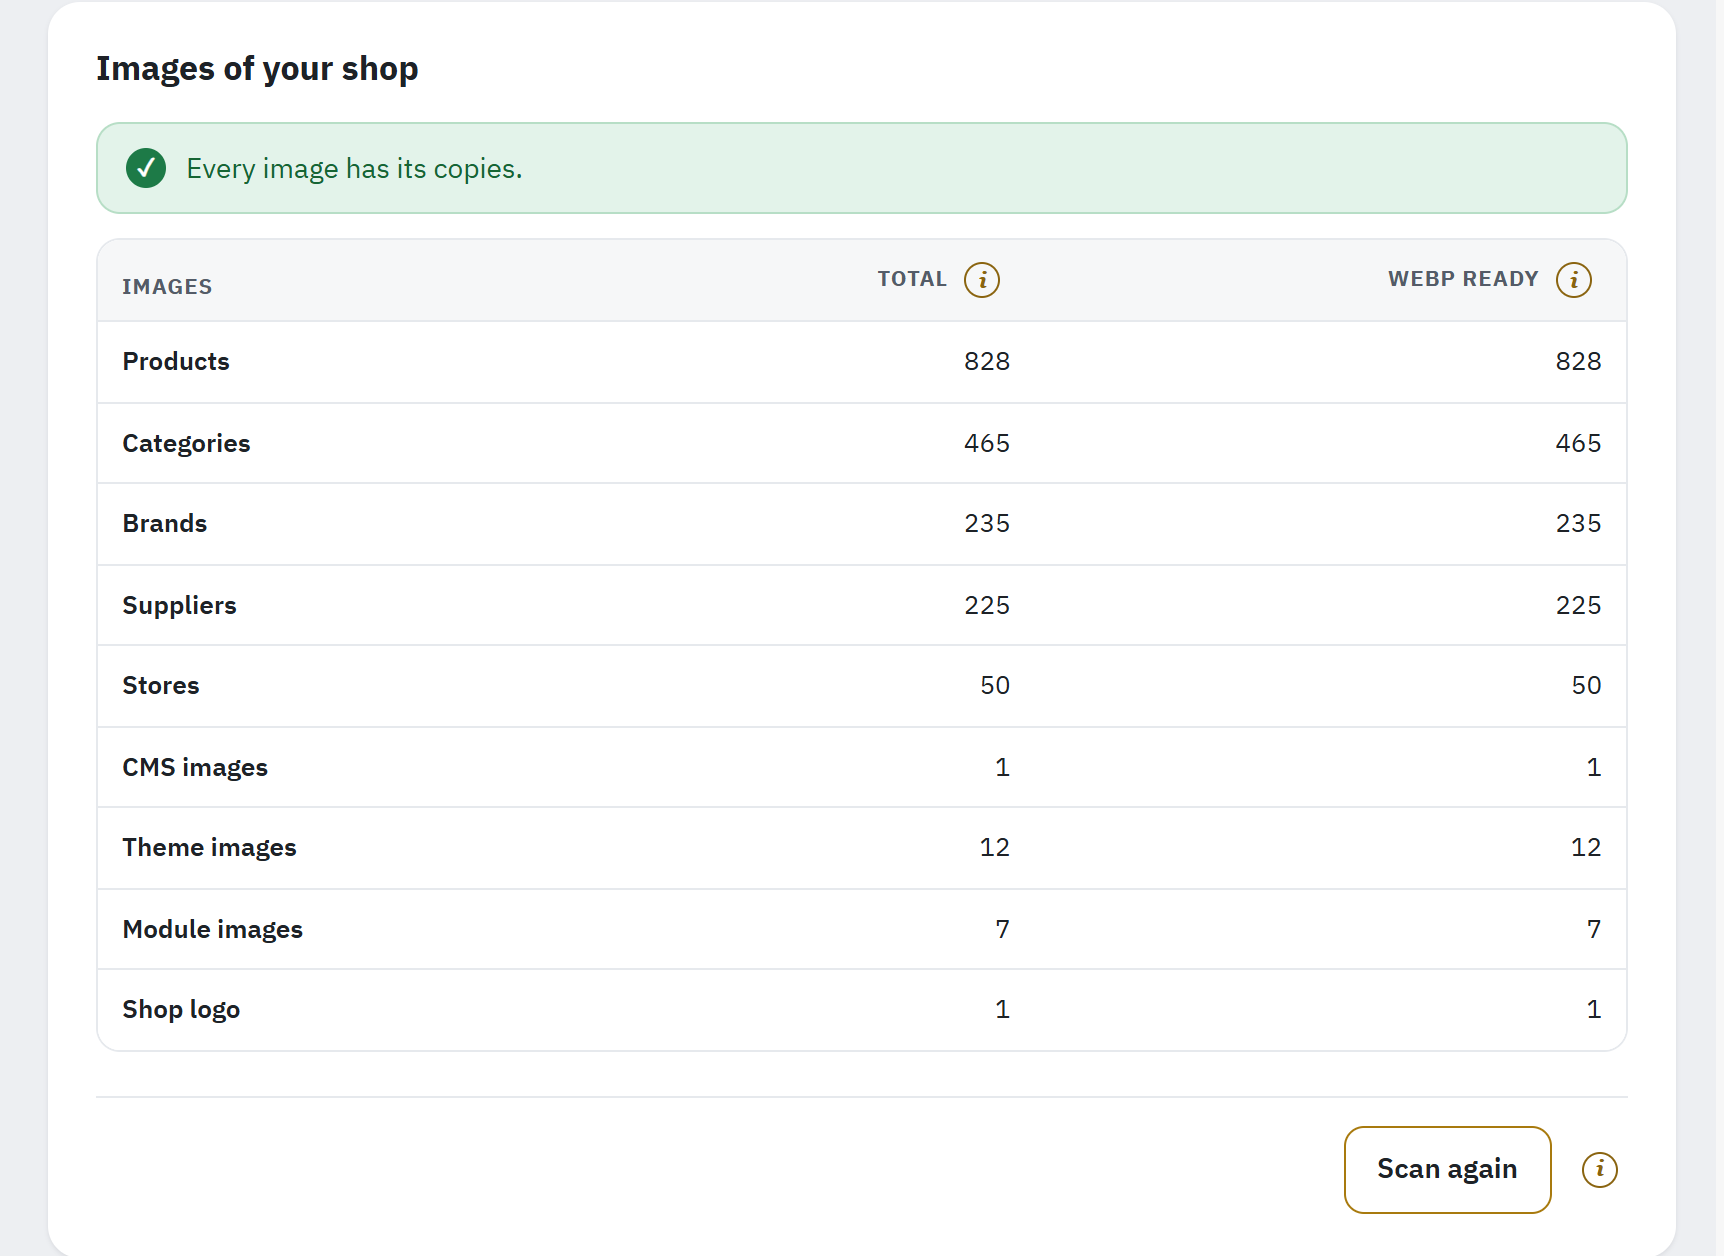
- The summary: what is left to do.
- One row per kind of image.
- The images found and the copies ready per format.
- Scan again looks through the image folders for new images and converts them.
The card opens with a summary in colour: Every image has its copies. in green, Images waiting for a copy: 120. in blue, The first run lists the images of your shop. before the first run, or, in orange, No copy can be created on this server yet: the Overview says what is missing. It changes as the conversion goes on.
The rows are the kinds of images you chose in Images to convert: Products, Categories, Brands, Suppliers, Stores, CMS images, Theme images, Module images and Shop logo. The columns, each with its (i) help:
| Column | What it counts |
|---|---|
| Total | Every image file of this kind the module found in your shop. PrestaShop keeps each product, category or brand image in several sizes, and each size counts. |
| WebP ready, AVIF ready | Image files that have a copy of that format, made by the module or by PrestaShop itself. A format that is off, or that your server cannot create, has no column. |
| Waiting | Image files still waiting for a copy in a format that is on. Convert now makes them. |
| Original kept | Copies that were not smaller than the original, so visitors get the original file. Each format counts on its own. |
| Failed | Copies that could not be created after three tries. Each format counts on its own; the list below says why. |
While images wait, every column is shown, as the conversion fills them. Once nothing waits, a column of zeros is left out: a shop whose images all have their copies sees only Total and the formats, as in the figure.
Convert now
The button Convert now is at the bottom of the card while images wait; its number is the count of images waiting. Once the images are listed and none waits, it is hidden.
- Click Convert now.
- The module creates the missing copies a few images at a time while this page stays open; the summary, the table and the bar move as it goes. The first run also lists the images of your shop.
- At the end, the line under the bar says what it did, for example The conversion is finished. Copies made: 120., or The conversion is finished: no image was waiting for a copy.
Leaving the page stops it, and the copies made so far stay; the automatic conversion goes on with the rest. When another conversion is running (the cron task, for example), the button waits and says so; try again a few minutes later.
Scan again
Scan again looks through the image folders again for images added, replaced or removed outside an upload, for example by an import or by FTP, and makes the copies of the new ones while this page stays open. At the end it answers with numbers: Scan finished: no new image found., or Scan finished, new images found: 12. with the copies made and the summary. The module also does this by itself: the folders every hour, the whole catalogue every week.
Images that could not be converted
The card Images that could not be converted appears under the table only when a copy failed. It lists each failed copy with its Image, Format, Reason, Attempts and Last change, a page at a time (Next page, First page). Typical reasons:
| Reason | What to do |
|---|---|
| The image is too large for this server. | Ask your host for a higher PHP memory limit, or upload a smaller image. |
| Converting this image stopped the server each time (a memory or time limit). | The same: a higher memory or time limit, or a smaller image. |
| The engine could not create this copy. | The details are in Advanced Parameters › Logs. A damaged file can be opened on your computer, saved again and uploaded. |
| The copy could not be saved in the image folder. | Make the image folder writable for the web server (ask your host). |
| EWWW could not convert this image. | Check your EWWW account, or let GD or Imagick convert it. |
| The image changed while it was being converted. | Nothing to do: it is converted again. |
Once the cause is fixed, click the button of that kind of image, for example Retry the failed copies: Products (3). It puts the failed copies back in the queue, with three new tries each.
On the product page
The product page of the back office shows a block WebP and AVIF images in its Modules tab, in PrestaShop’s own style. It counts the product’s images that have their copies, for example Images of this product: 3, with WebP copies: 3. (both formats when your server creates AVIF), with a line per format (ready, waiting, failed, original kept) and a line for a format that is switched off.

- How many of the product’s images have their copies.
- The detail per format.
- Convert the images of this product.
Convert the images of this product creates the product’s missing copies at once, without waiting for the automatic conversion. The button is greyed out with its reason when you may not change the module’s settings, when catalogue images are switched off in Images to convert, when both formats are off, or when the product is not saved yet.
Automatic conversion
New images and images without copies are converted without you opening the settings page. Uploads in the back office are converted at once; everything else is converted by short runs in the background, started by a cron task or by the back office itself. These settings apply to all shops.
How images are converted automatically
- On upload. Product, category, brand, supplier and store images get their copies as soon as you upload or import them in the back office, within two seconds per page. Images over 12 megapixels (over 4 megapixels for AVIF), what does not fit in those two seconds, and images added through the webservice or the command line wait for the next run, so the upload stays quick.
- Cron task. Your hosting calls the module’s cron address on a schedule; each call converts images for up to 50 seconds. It works even when nobody has the back office open, so it is the most reliable way.
- Back-office conversion. While an employee who may change these settings has the back office open, a few images are converted every minute.
- Folder checks. The folders are checked for new images every hour, and the whole catalogue every week, for images added, replaced or removed without an upload. When an image is deleted in the back office (or its product, category, brand, supplier or store), its copies are deleted too.
Is it on?
The section opens with the answer: Automatic conversion is on. while the back-office conversion is on or the cron task called in the last 48 hours, else Only images you upload are converted automatically., and the Cron task card opens by itself (Cron task). Under it, one sentence says what the back office does, and one when the cron task last called, such as Cron task: last call 3 h ago.
How conversion runs
The card How conversion runs holds two switches and one Save button. Convert while the back office is open (on by default) is the back-office conversion described above. Several open tabs share one run a minute, and a tab in the background does not run. If you have a cron task, you can leave it on or switch it off.
Gentle mode
With Pause after each image (off by default), the cron task and the back-office conversion pause a tenth of a second after each image, so a small or busy server keeps answering your visitors quickly; the conversion takes longer. Turn it on if your shop gets slower while images are converted.
Last runs
The card Last runs shows when each trigger last converted images, with the memory limit it had: Cron task, Back-office conversion, Convert now and Image uploads.
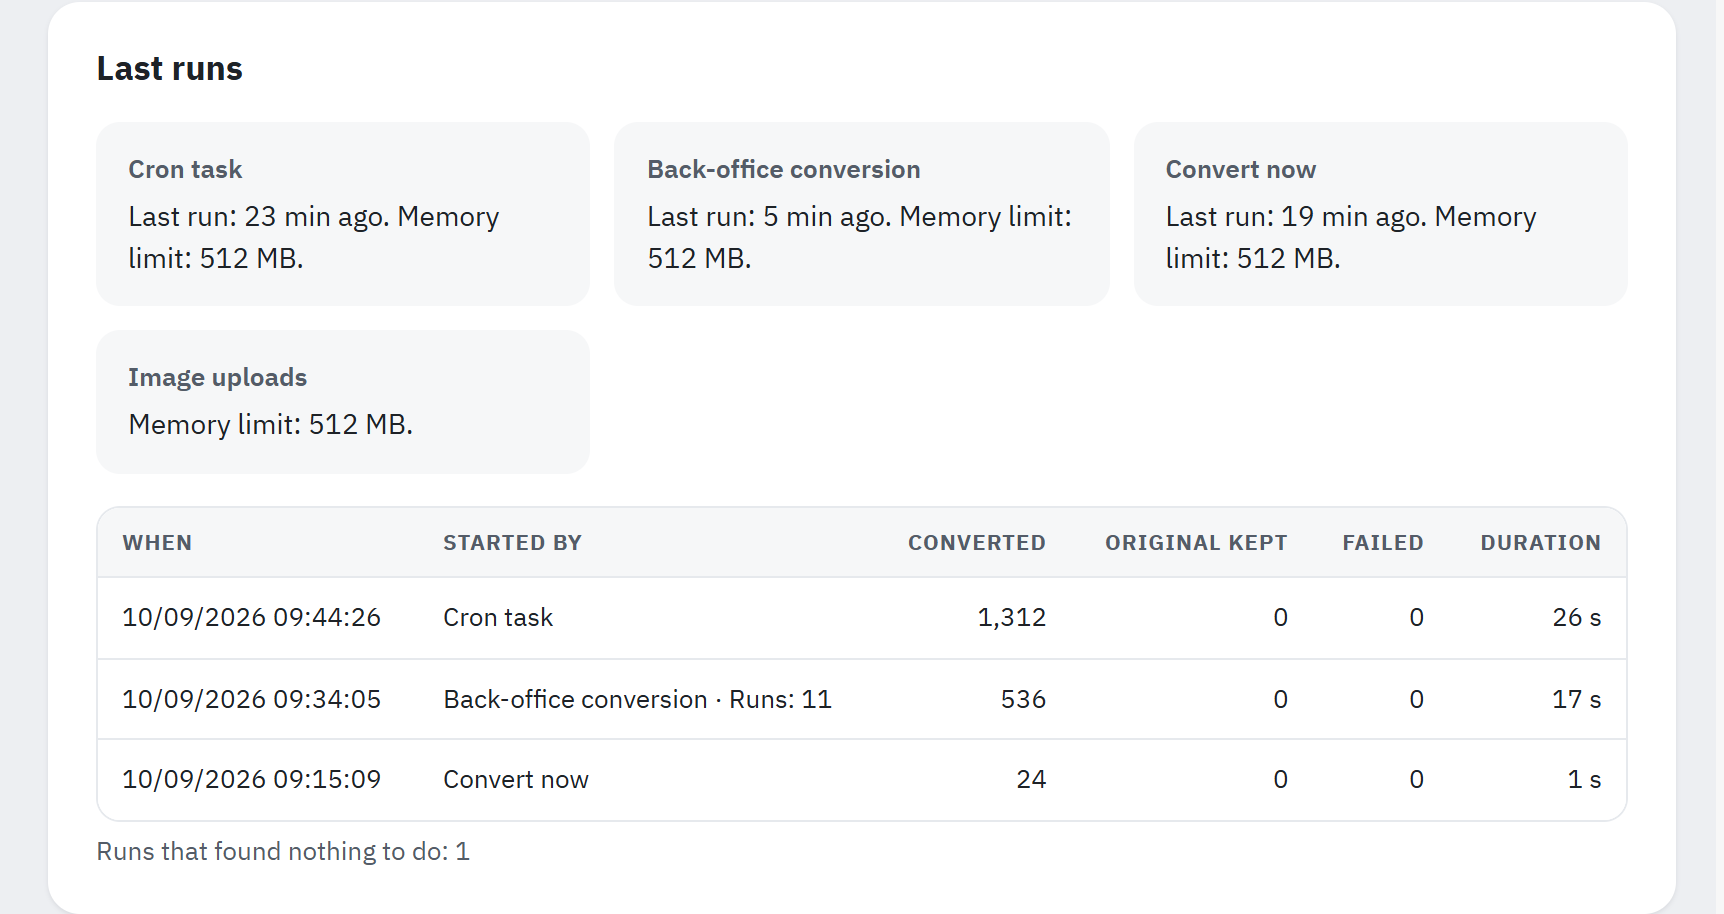
- The last run of each trigger.
- The recent runs that converted images, kept an original or stopped early.
- The runs that found nothing to do, counted in one line.
Below, a table lists the recent runs with When, Started by, Converted, Original kept, Failed and Duration; when a run stopped early (for example because another conversion was running), a Note line under it says why. Runs of Convert now and of the back-office conversion that follow each other share one line (Runs: 4). Runs that found nothing to do are only counted, under the table.
The Overview warns when no automatic run (cron task or back-office conversion) happened in the last 48 hours.
Cron task
The card Cron task comes near the end of the section, closed unless the cron task is the missing part: click it to open it. Add its address to your hosting’s cron jobs, to be called every 15 minutes.
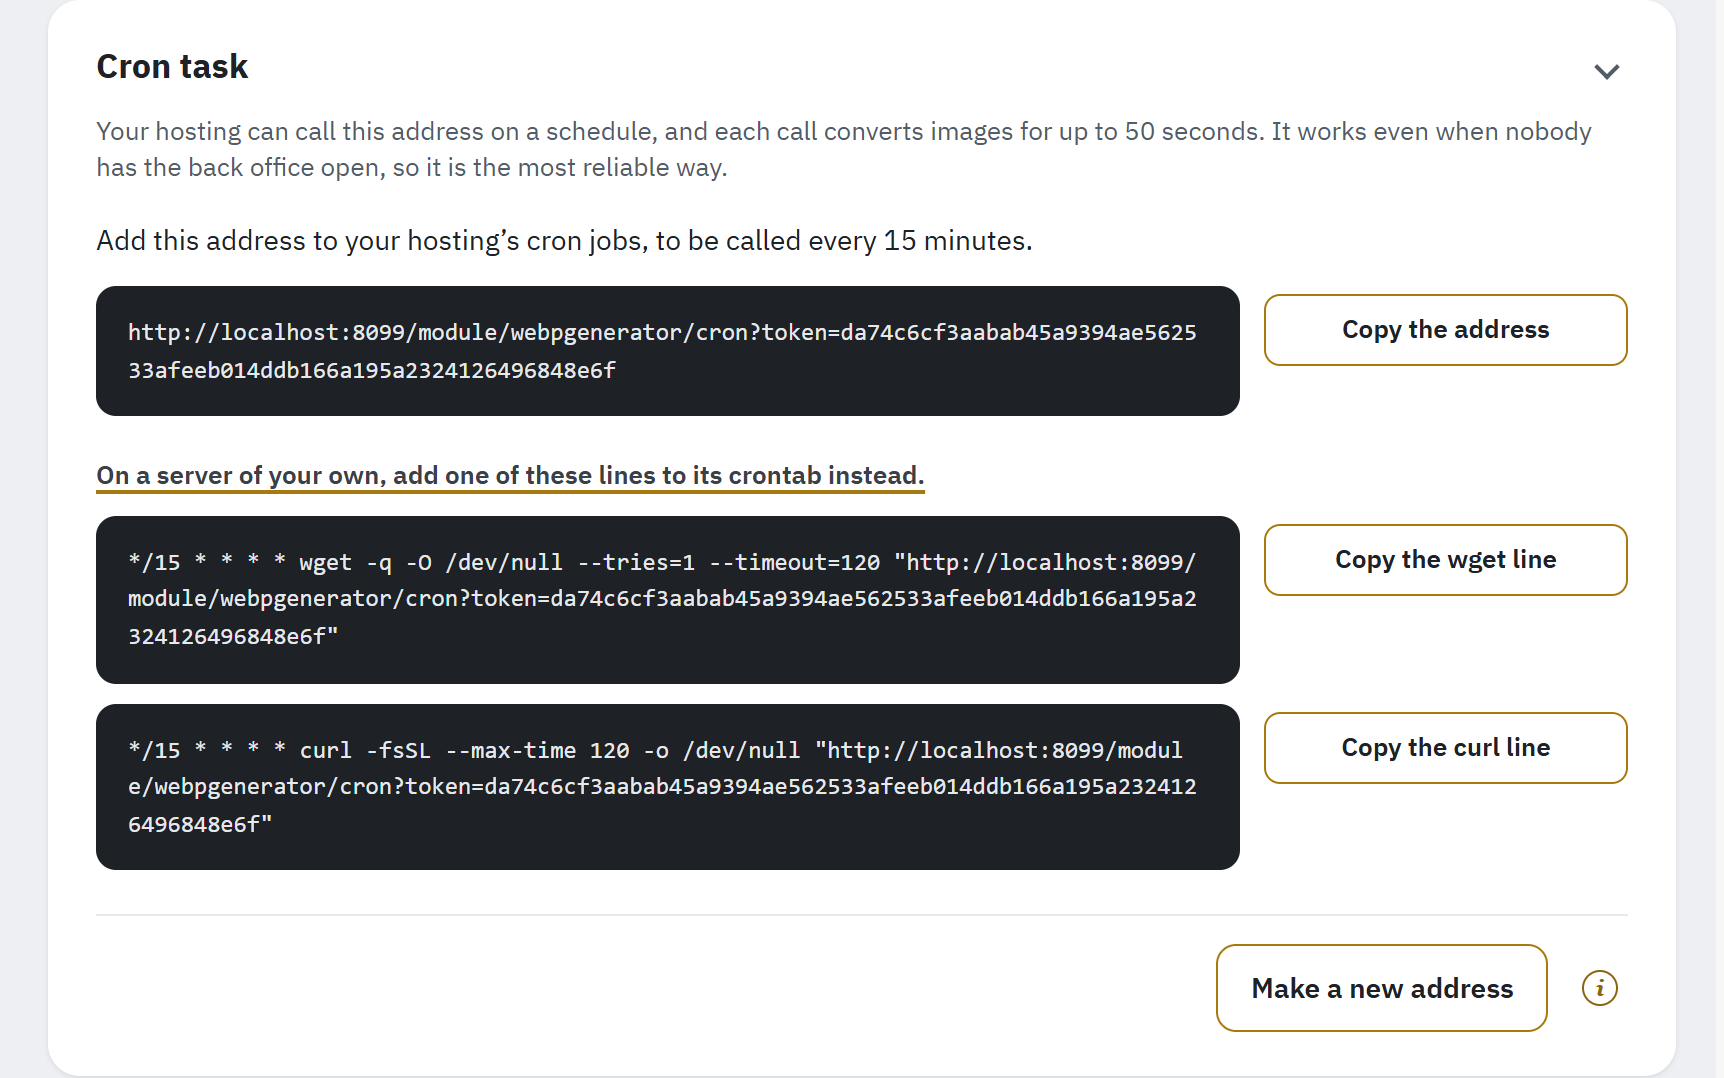
- The cron address and Copy the address.
- The crontab lines for a server of your own, each with its copy button.
- Make a new address.
- In the Cron task card, click Copy the address next to the address.
- In your hosting panel, open the cron jobs (in cPanel: Cron Jobs; in Plesk: Scheduled Tasks, task type Fetch a URL). Set it to run every 15 minutes.
- As the command, paste the address in Plesk, or, in cPanel, the line that Copy the wget line (or Copy the curl line) copies, without its first five fields: everything from
wgetorcurlon. - After the next call, the top of the section and Last runs say when the cron task last ran, and the Overview shows Automatic conversion is running.
On a server of your own, open On a server of your own, add one of these lines to its crontab instead., and copy one of its lines with Copy the wget line or Copy the curl line. They look like this (with your own address):
*/15 * * * * curl -fsSL --max-time 120 -o /dev/null "https://www.example.com/module/webpgenerator/cron?token=…"The address contains a secret token. Only employees who may change these settings see the full address. Make a new address, at the foot of the card, replaces it when it has become known outside your team: confirm, and the old address stops working at once, so update your cron job afterwards.
Folder checks
The card Folder checks says when the folders and the whole catalogue were last checked. Scan again checks every image folder and the whole catalogue again, for images added, replaced or removed without an upload, at the next conversion run. Use it after an import, after copying images by FTP or after installing a new theme.